使用 Kotlin 與 JUnit 測試 Java 程式碼 – 教學
Kotlin 與 Java 完全互通,這意指您可以使用 Kotlin 為 Java 程式碼編寫測試,並將它們與同一個專案中現有的 Java 測試一起執行。
在本教學中,您將學習如何:
- 配置混合 Java–Kotlin 專案,以使用 JUnit 執行測試。
- 新增驗證 Java 程式碼的 Kotlin 測試。
- 使用 Maven 或 Gradle 執行測試。
在開始之前,請確保您具備:
- 已安裝 Kotlin 擴充套件 的 IntelliJ IDEA 或 VS Code。
- Java 17 或更高版本。
配置專案
在您的 IDE 中,從版本控制系統複製範例專案:
texthttps://github.com/kotlin-hands-on/kotlin-junit-sample.git導覽至
initial模組並查看專案結構:textkotlin-junit-sample/ ├── initial/ │ ├── src/ │ │ ├── main/java/ # Java 原始碼 │ │ └── test/java/ # Java 中的 JUnit 測試 │ ├── pom.xml # Maven 配置 │ └── build.gradle.kts # Gradle 配置initial模組包含一個使用 Java 編寫的簡單 Todo 應用程式,並附帶一個測試。在同一個目錄中,開啟您的建置檔案並更新其內容以支援 Kotlin:
xml- 在
<properties>區段中,設定 Kotlin 版本。 - 在
<dependencies>區段中,新增 JUnit Jupiter 相依性以執行測試。 - 在
<build><plugins>區段中,套用<extensions>設定為true的kotlin-maven-plugin。它會自動向建置新增對應的執行程序和kotlin-stdlib相依性。 - 當使用啟用了 extensions 的 Kotlin Maven 外掛程式時,您不需要在
<build><pluginManagement>區段中新增maven-compiler-plugin。
kotlin// build.gradle.kts group = "org.jetbrains.kotlin" version = "1.0-SNAPSHOT" description = "kotlin-junit-complete" java.sourceCompatibility = JavaVersion.VERSION_17 plugins { application kotlin("jvm") version "2.4.0" } kotlin { jvmToolchain(17) } application { mainClass.set("org.jetbrains.kotlin.junit.App") } repositories { mavenCentral() } dependencies { implementation("com.gitlab.klamonte:jexer:1.6.0") testImplementation(kotlin("test")) testImplementation(libs.org.junit.jupiter.junit.jupiter.api) testImplementation(libs.org.junit.jupiter.junit.jupiter.params) testRuntimeOnly(libs.org.junit.jupiter.junit.jupiter.engine) testRuntimeOnly(libs.org.junit.platform.junit.platform.launcher) } tasks.test { useJUnitPlatform() }- 在
plugins {}區塊中,新增kotlin("jvm")外掛程式。 - 設定 JVM 工具鏈版本以符合您的 Java 版本。
- 在
dependencies {}區塊中,新增kotlin.test程式庫,它提供了 Kotlin 的測試公用程式並與 JUnit 整合。
Kotlin/JVM 支援最新的穩定 JUnit 版本 JUnit 6。您可以在
gradle/libs.versions.toml版本目錄中找到它。如果您通常偏好使用版本目錄,甚至可以在那裡新增
kotlin("jvm")外掛程式:toml# gradle/libs.versions.toml [versions] kotlin = "2.4.0" junit = "6.0.3" [libraries] org-junit-jupiter-junit-jupiter-api = { module = "org.junit.jupiter:junit-jupiter-api", version.ref = "junit" } org-junit-jupiter-junit-jupiter-params = { module = "org.junit.jupiter:junit-jupiter-params", version.ref = "junit" } org-junit-jupiter-junit-jupiter-engine = { module = "org.junit.jupiter:junit-jupiter-engine", version.ref = "junit" } org-junit-platform-junit-platform-launcher = { module = "org.junit.platform:junit-platform-launcher" } [plugins] kotlinJvm = { id = "org.jetbrains.kotlin.jvm", version.ref = "kotlin" }- 在
在您的 IDE 中重新載入建置檔案。
如需有關建置檔案設定的更多詳細說明,請參閱 專案配置。
新增您的第一個 Kotlin 測試
位於 initial/src/test/java 中的 TodoItemTest.java 測試已經驗證了應用程式的基本功能:項目建立、預設值、唯一 ID 以及狀態變更。
您可以透過新增一個驗證存儲庫層級行為的 Kotlin 測試來擴展測試涵蓋率:
導覽至相同的測試原始碼目錄
initial/src/test/java。在與 Java 測試相同的套件中建立
TodoRepositoryTest.kt檔案。建立帶有欄位宣告和設定函式的測試類別:
kotlinpackage org.jetbrains.kotlin.junit import org.junit.jupiter.api.BeforeEach import org.junit.jupiter.api.Assertions import org.junit.jupiter.api.Test import org.junit.jupiter.api.DisplayName internal class TodoRepositoryTest { lateinit var repository: TodoRepository lateinit var testItem1: TodoItem lateinit var testItem2: TodoItem @BeforeEach fun setUp() { repository = TodoRepository() testItem1 = TodoItem("Task 1", "Description 1") testItem2 = TodoItem("Task 2", "Description 2") } }- JUnit 註解在 Kotlin 中的運作方式與在 Java 中相同。
- 在 Kotlin 中,
lateinit關鍵字 允許宣告稍後才初始化的非 null 屬性。這有助於避免在測試中使用可為 null 的型別 (TodoRepository?)。
在
TodoRepositoryTest類別內新增一個測試,以檢查初始存儲庫狀態及其大小:kotlin@Test @DisplayName("Should start with empty repository") fun shouldStartEmpty() { Assertions.assertEquals(0, repository.size()) Assertions.assertTrue(repository.all.isEmpty()) }- 與 Java 靜態匯入不同,Jupiter 的
Assertions是以類別形式匯入,並作為斷言函式的限定詞使用。 - 在 Kotlin 中,您可以透過
repository.all將 Java 的 getter 存取為屬性,而不是呼叫.getAll()。
- 與 Java 靜態匯入不同,Jupiter 的
編寫另一個測試來驗證所有項目的複製行為:
kotlin@Test @DisplayName("Should return defensive copy of items") fun shouldReturnDefensiveCopy() { repository.add(testItem1) val items1 = repository.all val items2 = repository.all Assertions.assertNotSame(items1, items2) Assertions.assertThrows( UnsupportedOperationException::class.java ) { items1.clear() } Assertions.assertEquals(1, repository.size()) }- 若要從 Kotlin 類別取得 Java 類別物件,請使用
::class.java。 - 您可以將複雜的斷言拆分為多行,而無需使用任何特殊的接續字元。
- 若要從 Kotlin 類別取得 Java 類別物件,請使用
新增一個測試以驗證透過 ID 尋找項目:
kotlin@Test @DisplayName("Should find item by ID") fun shouldFindItemById() { repository.add(testItem1) repository.add(testItem2) val found = repository.getById(testItem1.id()) Assertions.assertTrue(found.isPresent) Assertions.assertEquals(testItem1, found.get()) }Kotlin 與 Java 的
OptionalAPI 配合良好。它會自動將 getter 方法轉換為屬性,這就是為什麼這裡將isPresent()方法作為屬性存取的原因。編寫一個測試來驗證項目移除機制:
kotlin@Test @DisplayName("Should remove item by ID") fun shouldRemoveItemById() { repository.add(testItem1) repository.add(testItem2) val removed = repository.remove(testItem1.id()) Assertions.assertTrue(removed) Assertions.assertEquals(1, repository.size()) Assertions.assertTrue(repository.getById(testItem1.id()).isEmpty) Assertions.assertTrue(repository.getById(testItem2.id()).isPresent) } @Test @DisplayName("Should return false when removing non-existent item") fun shouldReturnFalseForNonExistentRemoval() { repository.add(testItem1) val removed = repository.remove("non-existent-id") Assertions.assertFalse(removed) Assertions.assertEquals(1, repository.size()) }在 Kotlin 中,您可以串聯方法呼叫和屬性存取,例如
repository.getById(id).isEmpty。
您可以向
TodoRepositoryTest測試類別新增更多測試,以涵蓋更多功能。請參閱範例專案complete模組中的完整原始碼。
執行測試
同時執行 Java 和 Kotlin 測試,以驗證您的專案運作符合預期:
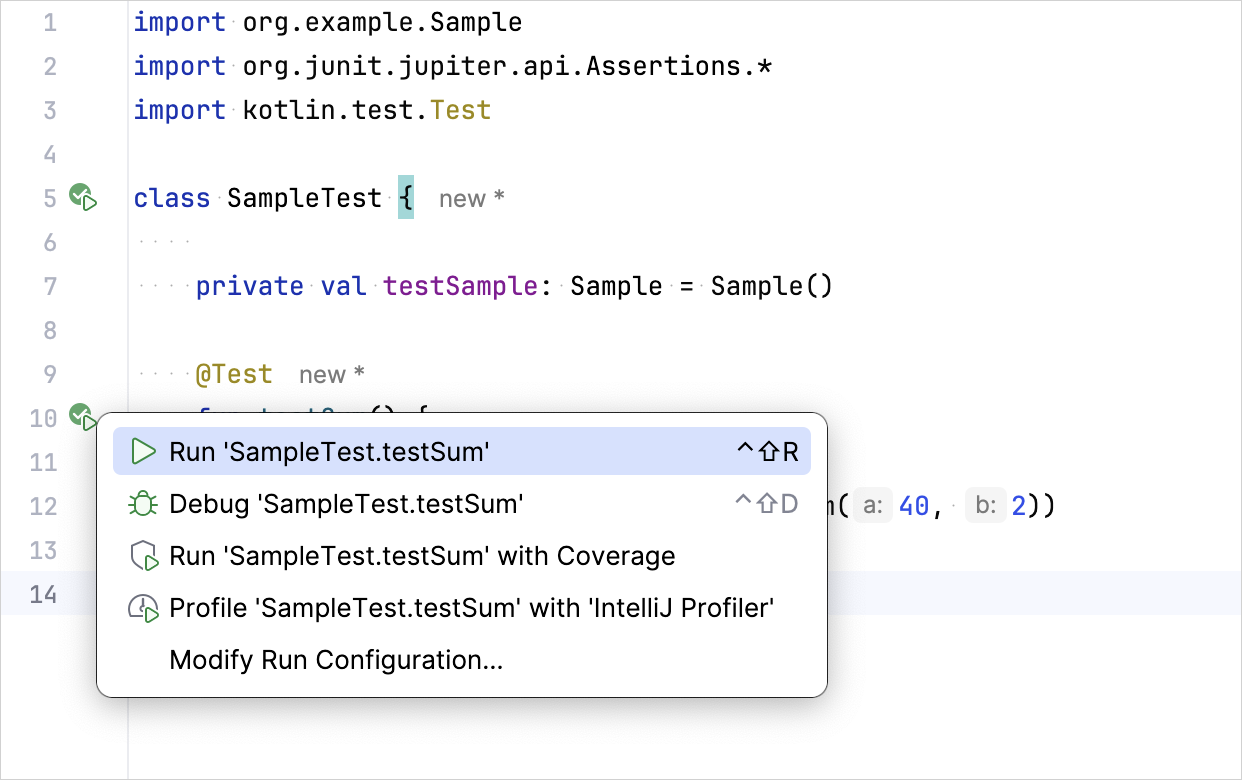
使用裝訂邊圖示執行測試:
您也可以從
initial目錄使用命令列執行所有專案測試:bashmvn testbash./gradlew test透過更改其中一個變數值來檢查測試是否正常運作。例如,修改
shouldAddItem測試以預期錯誤的存儲庫大小:kotlin@Test @DisplayName("Should add item to repository") fun shouldAddItem() { repository.add(testItem1) Assertions.assertEquals(2, repository.size()) // 從 1 改為 2 Assertions.assertTrue(repository.all.contains(testItem1)) }再次執行測試並驗證其是否失敗:
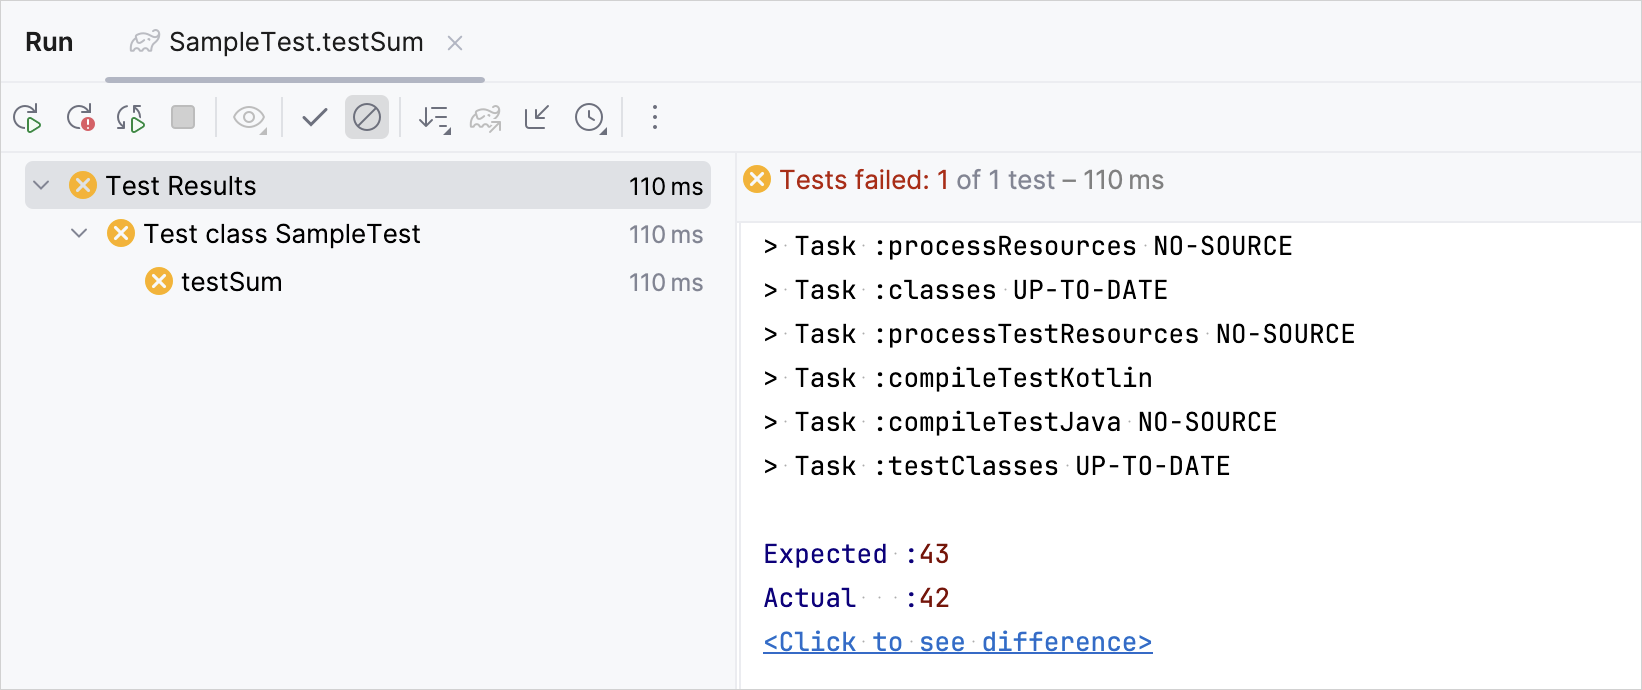
您可以在範例專案的
complete模組中找到已完整配置並包含測試的專案。
下一步
進一步了解 使用 Maven 測試 Kotlin 專案。