進階:類別與介面
在入門導覽中,您學習了如何使用類別和資料類別來儲存資料,並維護可以在程式碼中共享的一組特性。最終,您會想要建立一個階層來更有效率地在專案中共享程式碼。本章節將說明 Kotlin 提供的程式碼共享選項,以及它們如何讓您的程式碼更安全、更容易維護。
類別繼承
在前一個章節中,我們介紹了如何在不修改原始原始碼的情況下,使用擴充方法來擴充類別。但如果您正在處理一些複雜的內容,需要在類別之間共享程式碼呢?在這種情況下,您可以使用類別繼承。
預設情況下,Kotlin 中的類別是不可以被繼承的。Kotlin 這樣設計是為了防止意外的繼承,並讓您的類別更容易維護。
Kotlin 類別僅支援單一繼承,這意味著一次只能從一個類別繼承。這個類別被稱為父類別。
類別的父類別可能繼承自另一個類別(祖父類別),從而形成一個階層。在 Kotlin 類別階層的最頂層是共同的父類別:Any。所有類別最終都繼承自 Any 類別:
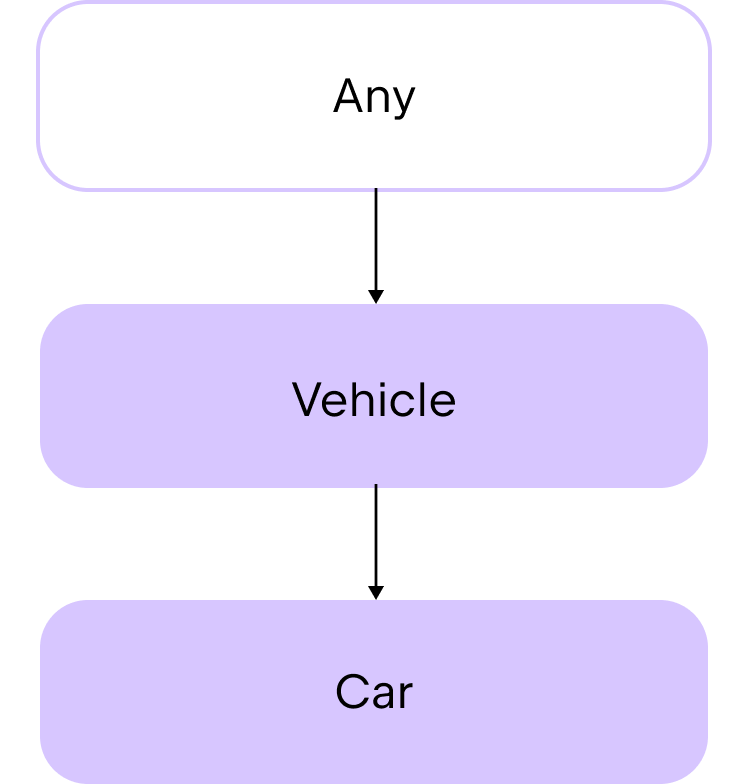
Any 類別會自動提供 toString() 函式作為成員函式。因此,您可以在任何類別中使用這個繼承來的函式。例如:
class Car(val make: String, val model: String, val numberOfDoors: Int)

fun main() {
    val car1 = Car("Toyota", "Corolla", 4)

    // 透過字串範本使用 .toString() 函式來列印類別屬性
    println("Car1: make=${car1.make}, model=${car1.model}, numberOfDoors=${car1.numberOfDoors}")
    // Car1: make=Toyota, model=Corolla, numberOfDoors=4
}
如果您想使用繼承在類別之間共享一些程式碼,請先考慮使用抽象類別。
抽象類別
抽象類別預設是可以被繼承的。抽象類別的目的是提供成員供其他類別繼承或實作。因此,它們有建構函式,但您不能從中建立執行個體。在子類別中,您使用 override 關鍵字來定義父類別屬性和函式的行為。透過這種方式,您可以說子類別「覆寫」了父類別的成員。
當您定義繼承函式或屬性的行為時,我們稱之為一個實作。
抽象類別可以同時包含具有實作的函式和屬性,以及不具備實作的函式和屬性(稱為抽象函式和屬性)。
要建立抽象類別,請使用 abstract 關鍵字:
abstract class Animal要宣告一個沒有實作的函式或屬性,同樣使用 abstract 關鍵字:
abstract fun makeSound()
abstract val sound: String
例如,假設您想建立一個名為 Product 的抽象類別,並從中建立子類別來定義不同的產品類別:
abstract class Product(val name: String, var price: Double) {
    // 用於產品類別的抽象屬性
    abstract val category: String

    // 一個可以由所有產品共享的函式
    fun productInfo(): String {
        return "Product: $name, Category: $category, Price: $price"
    }
}
在該抽象類別中:
- 建構函式有兩個參數:產品的
name(名稱)和price(價格)。 - 有一個抽象屬性,以字串形式包含產品類別。
- 有一個函式用於列印產品資訊。
讓我們為電子產品建立一個子類別。在子類別中為 category 屬性定義實作之前,您必須使用 override 關鍵字:
class Electronic(name: String, price: Double, val warranty: Int) : Product(name, price) {
    override val category = "Electronic"
}
Electronic 類別:
- 繼承自
Product抽象類別。 - 在建構函式中有一個額外的參數:
warranty(保固),這是電子產品特有的。 - 覆寫
category屬性使其包含字串"Electronic"。
現在,您可以像這樣使用這些類別:
abstract class Product(val name: String, var price: Double) {
    // 用於產品類別的抽象屬性
    abstract val category: String

    // 一個可以由所有產品共享的函式
    fun productInfo(): String {
        return "Product: $name, Category: $category, Price: $price"
    }
}

class Electronic(name: String, price: Double, val warranty: Int) : Product(name, price) {
    override val category = "Electronic"
}

fun main() {
    // 建立 Electronic 類別的執行個體
    val laptop = Electronic(name = "Laptop", price = 1000.0, warranty = 2)

    println(laptop.productInfo())
    // Product: Laptop, Category: Electronic, Price: 1000.0
}
雖然抽象類別非常適合以此方式共享程式碼,但它們受到限制,因為 Kotlin 中的類別僅支援單一繼承。如果您需要從多個來源繼承,請考慮使用介面。
介面
介面與類別相似,但有一些不同之處:
- 您不能建立介面的執行個體。它們沒有建構函式或標頭(header)。
- 它們的函式和屬性預設是隱式可繼承的。在 Kotlin 中,我們說它們是 「open」 的。
- 如果不給予函式實作,您不需要將它們標記為
abstract。
與抽象類別類似,您使用介面來定義一組函式和屬性,供類別稍後繼承和實作。這種方法有助於您專注於介面所描述的抽象,而不是特定的實作細節。使用介面可以讓您的程式碼:
- 更具模組化,因為它隔離了不同部分,允許它們獨立發展。
- 更容易理解,因為它將相關功能分組為一個具凝聚力的集合。
- 更容易測試,因為您可以快速地將實作替換為測試用的模擬物件 (mock)。
要宣告介面,請使用 interface 關鍵字:
interface PaymentMethod介面實作
介面支援多重繼承,因此一個類別可以同時實作多個介面。首先,讓我們考慮一個類別實作一個介面的情況。
要建立一個實作介面的類別,請在類別標頭後加上冒號,接著是要實作的介面名稱。介面名稱後面不使用圓括號 (),因為介面沒有建構函式:
class CreditCardPayment : PaymentMethod例如:
interface PaymentMethod {
    // 函式預設是可繼承的
    fun initiatePayment(amount: Double): String
}

class CreditCardPayment(val cardNumber: String, val cardHolderName: String, val expiryDate: String) : PaymentMethod {
    override fun initiatePayment(amount: Double): String {
        // 模擬使用信用卡處理付款
        return "Payment of $amount initiated using Credit Card ending in ${cardNumber.takeLast(4)}."
    }
}

fun main() {
    val paymentMethod = CreditCardPayment("1234 5678 9012 3456", "John Doe", "12/25")
    println(paymentMethod.initiatePayment(100.0))
    // Payment of $100.0 initiated using Credit Card ending in 3456.
}
範例中:
PaymentMethod是一個介面,具有一個沒有實作的initiatePayment()函式。CreditCardPayment是一個實作PaymentMethod介面的類別。CreditCardPayment類別覆寫了繼承的initiatePayment()函式。paymentMethod是CreditCardPayment類別的執行個體。- 在
paymentMethod執行個體上呼叫被覆寫的initiatePayment()函式,並帶入參數100.0。
要建立一個實作多個介面的類別,請在類別標頭後加上冒號,接著是要實作的介面名稱,並用逗號分隔:
class CreditCardPayment : PaymentMethod, PaymentType例如:
interface PaymentMethod {
    fun initiatePayment(amount: Double): String
}

interface PaymentType {
    val paymentType: String
}

class CreditCardPayment(val cardNumber: String, val cardHolderName: String, val expiryDate: String) : PaymentMethod,
    PaymentType {
    override fun initiatePayment(amount: Double): String {
        // 模擬使用信用卡處理付款
        return "Payment of $amount initiated using Credit Card ending in ${cardNumber.takeLast(4)}."
    }

    override val paymentType: String = "Credit Card"
}

fun main() {
    val paymentMethod = CreditCardPayment("1234 5678 9012 3456", "John Doe", "12/25")
    println(paymentMethod.initiatePayment(100.0))
    // Payment of $100.0 initiated using Credit Card ending in 3456.

    println("Payment is by ${paymentMethod.paymentType}")
    // Payment is by Credit Card
}
範例中:
PaymentMethod是一個介面,具有一個沒有實作的initiatePayment()函式。PaymentType是一個介面,具有一個尚未初始化的paymentType屬性。CreditCardPayment是一個實作了PaymentMethod與PaymentType介面的類別。CreditCardPayment類別覆寫了繼承的initiatePayment()函式與paymentType屬性。paymentMethod是CreditCardPayment類別的執行個體。- 在
paymentMethod執行個體上呼叫被覆寫的initiatePayment()函式。 - 在
paymentMethod執行個體上存取被覆寫的paymentType屬性。
有關介面和介面繼承的更多資訊,請參閱介面。
委託
介面很有用,但如果您的介面包含許多函式,其子類別最終可能會出現大量的樣板程式碼。如果您只想覆寫類別行為的一小部分,您會需要重複編寫許多相同的內容。
樣板程式碼是指在軟體專案的多個部分中重複使用,且幾乎沒有或完全沒有變動的一段程式碼。
例如,假設您有一個名為 DrawingTool 的介面,其中包含多個函式和一個名為 color 的屬性:
interface DrawingTool {
    val color: String
    fun draw(shape: String)
    fun erase(area: String)
    fun getToolInfo(): String
}
您建立了一個名為 PenTool 的類別,它實作了 DrawingTool 介面並為其所有成員提供實作:
class PenTool : DrawingTool {
    override val color: String = "black"

    override fun draw(shape: String) {
        println("Drawing $shape using a pen in $color")
    }

    override fun erase(area: String) {
        println("Erasing $area with pen tool")
    }

    override fun getToolInfo(): String {
        return "PenTool(color=$color)"
    }
}
您想建立一個像 PenTool 這樣具有相同行為但 color 值不同的類別。一種方法是建立一個新類別,該類別預期一個實作了 DrawingTool 介面的物件作為參數,例如 PenTool 類別的執行個體。然後,在類別內部覆寫 color 屬性。
但在這種情況下,您需要為 DrawingTool 介面的每個成員添加實作:
interface DrawingTool {
    val color: String
    fun draw(shape: String)
    fun erase(area: String)
    fun getToolInfo(): String
}

class PenTool : DrawingTool {
    override val color: String = "black"

    override fun draw(shape: String) {
        println("Drawing $shape using a pen in $color")
    }

    override fun erase(area: String) {
        println("Erasing $area with pen tool")
    }

    override fun getToolInfo(): String {
        return "PenTool(color=$color)"
    }
}
class CanvasSession(val tool: DrawingTool) : DrawingTool {
    override val color: String = "blue"

    override fun draw(shape: String) {
        tool.draw(shape)
    }

    override fun erase(area: String) {
        tool.erase(area)
    }

    override fun getToolInfo(): String {
        return tool.getToolInfo()
    }
}
fun main() {
    val pen = PenTool()
    val session = CanvasSession(pen)

    println("Pen color: ${pen.color}")
    // Pen color: black

    println("Session color: ${session.color}")
    // Session color: blue

    session.draw("circle")
    // Drawing circle with pen in black

    session.erase("top-left corner")
    // Erasing top-left corner with pen tool

    println(session.getToolInfo())
    // PenTool(color=black)
}
您可以看到,如果 DrawingTool 介面中有大量的成員函式,CanvasSession 類別中的樣板程式碼量可能會非常龐大。然而,還有另一種選擇。
在 Kotlin 中,您可以使用 by 關鍵字將介面實作委託給一個類別執行個體。例如:
class CanvasSession(val tool: DrawingTool) : DrawingTool by tool這裡,tool 是 PenTool 類別執行個體的名稱,成員函式的實作將委託給它。
現在您不需要在 CanvasSession 類別中手動實作成員函式。編譯器會自動根據 PenTool 類別為您完成這項工作。這可以讓您省去編寫大量樣板程式碼的麻煩。相反地,您只需針對想要在子類別中變更的行為編寫程式碼。
例如,如果您想變更 color 屬性的值:
interface DrawingTool {
    val color: String
    fun draw(shape: String)
    fun erase(area: String)
    fun getToolInfo(): String
}

class PenTool : DrawingTool {
    override val color: String = "black"

    override fun draw(shape: String) {
        println("Drawing $shape using a pen in $color")
    }

    override fun erase(area: String) {
        println("Erasing $area with pen tool")
    }

    override fun getToolInfo(): String {
        return "PenTool(color=$color)"
    }
}

class CanvasSession(val tool: DrawingTool) : DrawingTool by tool {
    // 沒有樣板程式碼!
    override val color: String = "blue"
}
fun main() {
    val pen = PenTool()
    val session = CanvasSession(pen)

    println("Pen color: ${pen.color}")
    // Pen color: black

    println("Session color: ${session.color}")
    // Session color: blue

    session.draw("circle")
    // Drawing circle with pen in black

    session.erase("top-left corner")
    // Erasing top-left corner with pen tool

    println(session.getToolInfo())
    // PenTool(color=black)
}
如果您願意,也可以在 CanvasSession 類別中覆寫繼承的成員函式行為,但現在您不必為每個繼承的成員函式都添加新程式碼。
如需更多資訊,請參閱委託。
練習
練習 1
想像一下您正在開發一套智慧家庭系統。智慧家庭通常有不同類型的裝置,它們都具有一些基本功能,但也有獨特的行為。在下面的程式碼範例中,補全名為 SmartDevice 的 abstract 類別,以便子類別 SmartLight 能夠成功編譯。
然後,建立另一個名為 SmartThermostat 的子類別,它繼承自 SmartDevice 類別,並實作 turnOn() 和 turnOff() 函式,回傳描述哪個恆溫器正在加熱或已關閉的列印語句。最後,添加另一個名為 adjustTemperature() 的函式,它接受一個溫度數值作為輸入並列印:$name thermostat set to $temperature°C.
提示
SmartDevice 類別中,添加 turnOn() 和 turnOff() 函式,以便稍後在 SmartThermostat 類別中覆寫它們的行為。 |--|--|
abstract class // 在此處編寫您的程式碼

class SmartLight(name: String) : SmartDevice(name) {
    override fun turnOn() {
        println("$name is now ON.")
    }

    override fun turnOff() {
        println("$name is now OFF.")
    }

   fun adjustBrightness(level: Int) {
        println("Adjusting $name brightness to $level%.")
    }
}

class SmartThermostat // 在此處編寫您的程式碼

fun main() {
    val livingRoomLight = SmartLight("Living Room Light")
    val bedroomThermostat = SmartThermostat("Bedroom Thermostat")

    livingRoomLight.turnOn()
    // Living Room Light is now ON.
    livingRoomLight.adjustBrightness(10)
    // Adjusting Living Room Light brightness to 10%.
    livingRoomLight.turnOff()
    // Living Room Light is now OFF.

    bedroomThermostat.turnOn()
    // Bedroom Thermostat thermostat is now heating.
    bedroomThermostat.adjustTemperature(5)
    // Bedroom Thermostat thermostat set to 5°C.
    bedroomThermostat.turnOff()
    // Bedroom Thermostat thermostat is now off.
}abstract class SmartDevice(val name: String) {
abstract fun turnOn()
abstract fun turnOff()
}
class SmartLight(name: String) : SmartDevice(name) {
override fun turnOn() {
println("$name is now ON.")
}
override fun turnOff() {
println("$name is now OFF.")
}
fun adjustBrightness(level: Int) {
println("Adjusting $name brightness to $level%.")
}
}
class SmartThermostat(name: String) : SmartDevice(name) {
override fun turnOn() {
println("$name thermostat is now heating.")
}
override fun turnOff() {
println("$name thermostat is now off.")
}
fun adjustTemperature(temperature: Int) {
println("$name thermostat set to $temperature°C.")
}
}
fun main() {
val livingRoomLight = SmartLight("Living Room Light")
val bedroomThermostat = SmartThermostat("Bedroom Thermostat")
livingRoomLight.turnOn()
// Living Room Light is now ON.
livingRoomLight.adjustBrightness(10)
// Adjusting Living Room Light brightness to 10%.
livingRoomLight.turnOff()
// Living Room Light is now OFF.
bedroomThermostat.turnOn()
// Bedroom Thermostat thermostat is now heating.
bedroomThermostat.adjustTemperature(5)
// Bedroom Thermostat thermostat set to 5°C.
bedroomThermostat.turnOff()
// Bedroom Thermostat thermostat is now off.
}練習 2
建立一個名為 Media 的介面,用於實作特定的媒體類別,例如 Audio、Video 或 Podcast。您的介面必須包含:
- 一個名為
title的屬性,用於代表媒體標題。 - 一個名為
play()的函式,用於播放媒體。
然後,建立一個名為 Audio 的類別來實作 Media 介面。Audio 類別必須在其建構函式中使用 title 屬性,並具有一個名為 composer 的額外 String 型別屬性。在類別中,實作 play() 函式以列印以下內容:"Playing audio: $title, composed by $composer"。
提示
override 關鍵字,以便在建構函式中實作來自介面的屬性。 interface // 在此處編寫您的程式碼
class // 在此處編寫您的程式碼
fun main() {
val audio = Audio("Symphony No. 5", "Beethoven")
audio.play()
// Playing audio: Symphony No. 5, composed by Beethoven
}範例解答
interface Media {
    val title: String
    fun play()
}

class Audio(override val title: String, val composer: String) : Media {
    override fun play() {
        println("Playing audio: $title, composed by $composer")
    }
}

fun main() {
    val audio = Audio("Symphony No. 5", "Beethoven")
    audio.play()
   // Playing audio: Symphony No. 5, composed by Beethoven
}
練習 3
您正在為電子商務應用程式開發支付處理系統。每種支付方式都需要能夠授權支付並處理交易。某些支付方式還需要能夠處理退款。
在
Refundable介面中,添加一個名為refund()的函式來處理退款。在
PaymentMethod抽象類別中:- 添加一個名為
authorize()的函式,它接收一個金額並列印一條包含該金額的訊息。 - 添加一個名為
processPayment()的抽象函式,它也接收一個金額。
- 添加一個名為
建立一個名為
CreditCard的類別,實作Refundable介面和PaymentMethod抽象類別。在此類別中,為refund()和processPayment()函式添加實作,以便它們列印以下語句:"Refunding $amount to the credit card.""Processing credit card payment of $amount."
interface Refundable {
    // 在此處編寫您的程式碼
}

abstract class PaymentMethod(val name: String) {
    // 在此處編寫您的程式碼
}

class CreditCard // 在此處編寫您的程式碼

fun main() {
    val visa = CreditCard("Visa")

    visa.authorize(100.0)
    // Authorizing payment of $100.0.
    visa.processPayment(100.0)
    // Processing credit card payment of $100.0.
    visa.refund(50.0)
    // Refunding $50.0 to the credit card.
}
範例解答
interface Refundable {
    fun refund(amount: Double)
}

abstract class PaymentMethod(val name: String) {
    fun authorize(amount: Double) {
        println("Authorizing payment of $amount.")
    }

    abstract fun processPayment(amount: Double)
}

class CreditCard(name: String) : PaymentMethod(name), Refundable {
    override fun processPayment(amount: Double) {
        println("Processing credit card payment of $amount.")
    }

    override fun refund(amount: Double) {
        println("Refunding $amount to the credit card.")
    }
}

fun main() {
    val visa = CreditCard("Visa")

    visa.authorize(100.0)
    // Authorizing payment of $100.0.
    visa.processPayment(100.0)
    // Processing credit card payment of $100.0.
    visa.refund(50.0)
    // Refunding $50.0 to the credit card.
}
練習 4
您有一個簡單的通訊應用程式,它具有一些基本功能,但您希望為「智慧」訊息添加一些功能,且不想重複編寫大量程式碼。
在下面的程式碼中,定義一個名為 SmartMessenger 的類別,它繼承自 Messenger 介面,但將實作委託給 BasicMessenger 類別的執行個體。
在 SmartMessenger 類別中,覆寫 sendMessage() 函式以發送智慧訊息。該函式必須接收一個 message 作為輸入,並回傳一個列印語句:"Sending a smart message: $message"。此外,呼叫來自 BasicMessenger 類別的 sendMessage() 函式,並在訊息前加上 [smart]。
您不需要在
SmartMessenger類別中重寫receiveMessage()函式。
|--|--|
interface Messenger {
    fun sendMessage(message: String)
    fun receiveMessage(): String
}

class BasicMessenger : Messenger {
    override fun sendMessage(message: String) {
        println("Sending message: $message")
    }

    override fun receiveMessage(): String {
        return "You've got a new message!"
    }
}

class SmartMessenger // 在此處編寫您的程式碼

fun main() {
    val basicMessenger = BasicMessenger()
    val smartMessenger = SmartMessenger(basicMessenger)

    basicMessenger.sendMessage("Hello!")
    // Sending message: Hello!
    println(smartMessenger.receiveMessage())
    // You've got a new message!
    smartMessenger.sendMessage("Hello from SmartMessenger!")
    // Sending a smart message: Hello from SmartMessenger!
    // Sending message: [smart] Hello from SmartMessenger!
}interface Messenger {
fun sendMessage(message: String)
fun receiveMessage(): String
}
class BasicMessenger : Messenger {
override fun sendMessage(message: String) {
println("Sending message: $message")
}
override fun receiveMessage(): String {
return "You've got a new message!"
}
}
class SmartMessenger(val basicMessenger: BasicMessenger) : Messenger by basicMessenger {
override fun sendMessage(message: String) {
println("Sending a smart message: $message")
basicMessenger.sendMessage("[smart] $message")
}
}
fun main() {
val basicMessenger = BasicMessenger()
val smartMessenger = SmartMessenger(basicMessenger)
basicMessenger.sendMessage("Hello!")
// Sending message: Hello!
println(smartMessenger.receiveMessage())
// You've got a new message!
smartMessenger.sendMessage("Hello from SmartMessenger!")
// Sending a smart message: Hello from SmartMessenger!
// Sending message: [smart] Hello from SmartMessenger!
}